Sugar Flower Tips: Make Your Own Gumpaste, and Edible Glue!
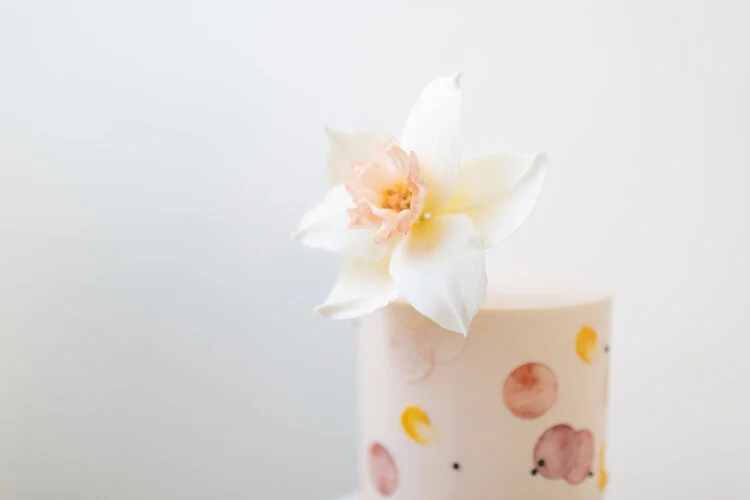
Sugar daffodil flower on a buttercream cake by Honey Crumb Cake Studio. Photo by Olivia Carson.
MAKE YOUR OWN GUMPASTE
Gumpaste is a specialized type of sugar dough, used to make sugar flowers. The vegetable-based “gum” in gumpaste promotes rapid drying of the dough, which results in firm, dry petals that hold their shape even in humid climates. (While fondant is also a type of sugar dough, it never dries completely hard, and is therefore best used for covering cakes — not for making sugar flowers.)
While there are several commercial brands of gumpaste available, we’ve found over the years that the best “brand” is the one we can make ourselves, from scratch. All the sugar flowers you see on our site, and our Instagram feed, were lovingly made by us (one petal at a time!) using gumpaste.
Our recipe is adapted from Nicholas Lodge, with a couple of modifications to the quantities and mixing technique. As you’ll see below, the recipe is in grams and measurements are precise, so you’ll need a good kitchen scale. Here’s how to make your own:
PASTEURIZED EGG WHITES: 150g
POWDERED SUGAR (we use C&H Brand, as it’s very finely textured): 870g + 120g
TYLOSE POWDER (we use Confectionary Arts International): 32g
VEGETABLE SHORTENING (e.g. Crisco, or Spectrum): 24g
Fit your electric mixer with a flat paddle attachment (or a scraper paddle, if you have one), and weigh your egg whites into the mixer bowl. Turn the mixer up to medium-high speed, to break up the egg whites just for a minute or two (they’ll start to look foamy).
Turn the mixer down to “stir” speed (low), and spoon in the 870g of powdered sugar. The mixture will look like soft Royal Icing — because it is! Continue to stir the mixture for just a minute or so, don’t whip it up too much or your gumpaste will end up with a spongy texture.
If you’re planning to color the entire batch (e.g. if you’ve got a large quantity of deep red roses to make, or you’re using the entire batch to make green leaves), then you can add your gel color at this stage. Make sure the paste is a shade darker than what you’d like to end up with. (The color will fade as your petals or leaves dry.) We typically add color to our paste later on, once it’s already matured for a day (see below).
Sprinkle in the tylose powder quickly but evenly, while the mixer is still set to “stir”. Turn the speed up to “high” for just a few seconds. The paste will begin to thicken rapidly, and will start to pull away from the sides of the bowl. Don’t overwork it!
Scrape the mixture out of the bowl onto a work surface that has been sprinkled with some of the reserved powdered sugar. You might not need all 120g, this depends on how humid your environment is. Grease up your hands with the shortening and knead the paste well, adding more of the reserved powdered sugar to form a soft dough. The paste shouldn’t be sticky, and you can check this by pinching a piece of paste with your fingers. They should come away clean.
Rub the kneaded ball of gumpaste with a thin layer of shortening, and then wrap with two layers of plastic wrap. Finally, placed the paste into a ziplock bag, and seal the bag well.
It’s best to let the gumpaste settle and mature for a day, if possible, in a cool environment. (We keep ours in the fridge, and let it come to room temp for 30 mins or so before using it.)
When you’re ready to use it, portion out the amount you need for your project, and knead in a little vegetable shortening to condition it. If you’re coloring the gumpaste at this stage, knead it in until the desired shade is achieved, using a little shortening on your hands to prevent sticking. (Liquid food coloring is not ideal for gumpaste. It’s best to use concentrated gel colors, like Americolor, or powdered food-grade pigments, like Crystal Colors, as they don’t add excessive moisture to the paste.)
Whenever you’re not using your paste, keep it well wrapped and away from air. We store ours in the fridge, wrapped in two layers of plastic wrap before being sealed in a ziplock bag. You can store the paste in the fridge for up to six months. If you’ve got a big flower project on the go and you’re planning to all the paste up fairly quickly, it’ll keep just fine at room temp (airtight) for up to ten days.
NOTE: Certain brands of tylose are “stronger” than others. The Pfeil & Holing (P&H) brand, for example, is pretty concentrated, so you can use a few grams less. As you get comfortable with making your own paste and using it, you’ll be able to adapt the recipe to suit the brand of tylose that’s most readily available to you. And, you can add more or less powdered sugar during the kneading stage, above, depending on the climate where you live.
TIPS
Avoid using too much cornstarch while rolling out your gumpaste. It’ll become very brittle.
Work in small batches when adding color, using a toothpick to introduce small amounts of gel color to your paste before kneading it in well. This is easier on your hands than kneading large amounts of paste at a time, and also allows for more precision in coloring your paste.
If you live in a very cold climate and your gumpaste feels very stiff, put it in the microwave for no more than 5 seconds to warm it up a little, and make kneading easier.
If you live in an exceptionally humid or rainy climate, you speed up the drying process by placing your sugar petals or leaves in the oven (with the heating element turned OFF, but the oven light ON).
BONUS: Edible Glue Recipe
You can use tylose powder to make your own edible glue as well. (Much cheaper than buying it commercially!)
Add 100g water to a glass bowl, or other microwave-safe container. Bring the water to a boil in the microwave. Add 1/4 tsp of tylose powder and stir with a fork to break up the clumps. Set the mixture aside for 30 mins, stirring now and then to help the tylose to dissolve. Strain into a small jar or lidded plastic container, and store in the fridge when not using. (Edible glue will last in the fridge for up to a week.)